
The Mission:
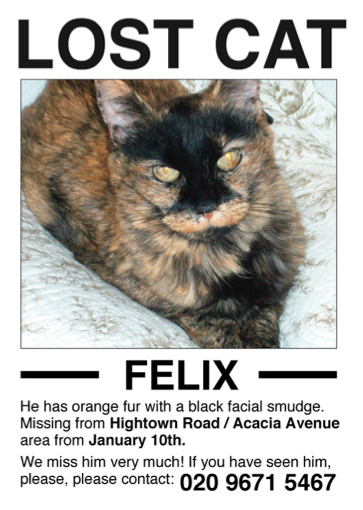
Felix the cat has gone missing. His owner made a poster to hang up in the neighborhood, but you realise making a website means many more people can see it.
Step 1:
- Make a new folder called Felix
- Make a new document called
index.htmland save it inside the folder called Felix - Now set up your document like you learnt in the previous session
<!DOCTYPE html>
<html>
    <head>
    </head>
    <body>
    </body>
</html>- Make a title and header. Remember the title goes in the head and the header goes in the body. Try using “Felix the cat is missing” as a title, and Missing as the h1. Right beneath the
<h1>we can make a<h2>saying “Felix the cat”.
<!DOCTYPE html>
<html>
    <head>
        <title> Felix the cat is missing </title>
    </head>
    <body>
        <h1>Missing</h1>
        <h2>Felix the cat</h2>
    </body>
</html>
Step 2:
We also need a picture of Felix, so people know what to look for. We’ve previously learned how to put in an image that’s already hosted somewhere on the internet, but this time we are going to use an image on our computer. We need to put the image felix.jpg in the same folder as our index.html, the folder you named Felix.
- Now, write the
<img>tag like you would normally, but in the src attribute, instead of writing a URL we just writefelix.jpg. And don’t forget to put in an alt attribute!
<img src="felix.jpg" alt="picture of Felix">Save your file and view it in a browser.
- The image is quite large, so we want to make it a bit smaller. We can do this by using height or width attributes (or both). We don’t specify the width in centimeters or meters or inches or feet, but in something called pixels. I’m going to go with 400 pixels for this image.
<img src="felix.jpg" alt="picture of Felix" width="400">Step 3:
Underneath the picture we should write a description of Felix, and give some details of when and where he went missing. For this we can just write some paragraphs.
<p>Felix is a very nice cat. He likes cuddles, sitting in front of the radiator and his toy mouse. His fur is orange. </p>
<p>He went missing from the garden yesterday.</p>
We also need some information about how to contact the owners if anyone has seen or found Felix.
<p>Have you seen Felix? Please contact his owners at felixowners@email.com</p>That’s just a pretend email address, but let’s make it so that if someone clicks on it, it opens up their email client. We do this almost the same way we make a link, but instead of a url we put in a mailto like this:
<p>Have you seen Felix? Please contact his owners at <a href="mailto:felixowners@email.com">felixowners@email.com</a></p>Save your document and check if it works in a browser!
Step 4: Adding strong text and emphasis
We really want people to find Felix, so we want to add some emphasis to ‘please’. We do this with the em tag.
<p>Have you seen Felix? <em>Please</em> contact his owners at felixowners@email.com</p>We also want ‘thank you’ to stand out, which we can do by adding the strong tag.
<p><strong>Thank you!</strong><p>Save your document and view it in the browser.
Notice how please is now in italics and Thank you is bold?
Step 5: Comments
Sometimes it is useful to write comments in the html file itself. By comments we mean stuff that is meant for humans to read if they’re viewing the file, and not for the browser to read and display. We do that by using the special code:
<!-- write anything here -->Anything between the the arrows is the comment. Let’s put a comment in our file saying this is a code club project and Felix is not real.
<!-- This is a Code Club project. Felix is not real and not really missing -->Step 6: More metadata (that’s just stuff that goes in the head)
- Let’s add who wrote the webpage to the webpage, so anyone viewing the file knows it’s you.
<meta name="author" content="#">- Replace the # with your name. It’s also common to add what language the website is in. We do this by adding an attribute to the
<html>tag.
<html lang="en">en stands for English.
It’s also good practice to add the character set (or alphabet) the document is written in. We usually use UTF-8.
<meta charset="UTF-8">We can also add a description of the webpage
<meta name="description" content="a page dedicated to finding the missing cat Felix">And some keywords, separated by commas
<meta name="keywords" content="Felix, cat, missing">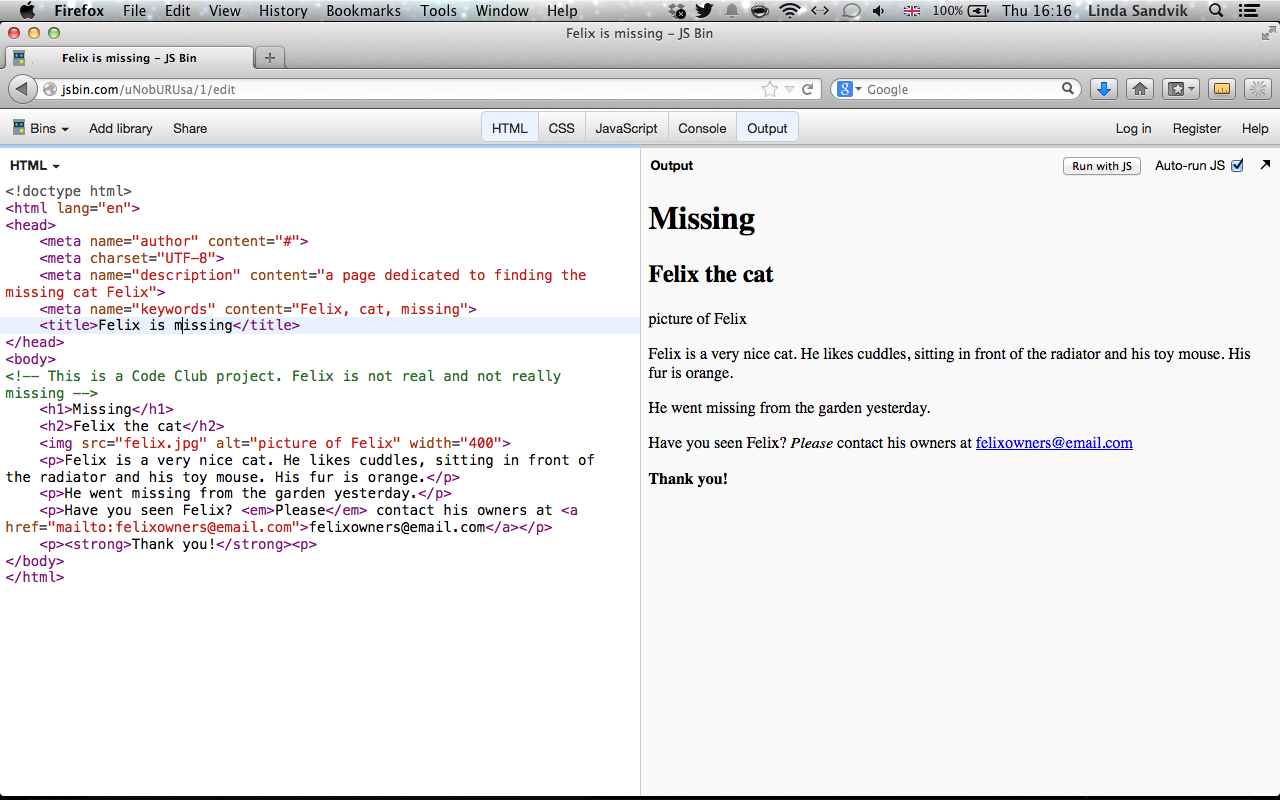
Further study:
- Is there anything else you could add to the webpage that would help people find Felix? More information? How would you add a map of where he went missing?
- More fun with images. Add an image that moves. Try adding the image
catswithhats.gifto the website. Open it in the browser to see what happens. - When Felix gets found and is safely back at home, use the tag
<del>to strike through any information that is no longer correct, like the fact that he’s missing. Use the<ins>tag to insert any new information instead, like Found!